7:21 AM How To Take The Best Screen Shots For Your Blog Post |
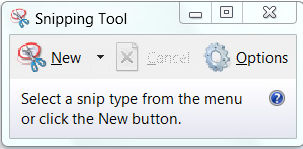
Windows Snipping Tool
This is the first tool that I ever used to take a screenshot. It gives you four options which are: free form snip, rectangular snip window snip and full page snip. However, I like to use a square shape for my screenshots. With the free form snip I could draw a circle around what I was trying to capture. I needed form. With using the rectangular snip. I would try to hold down the part I needed to capture but it was hard using the touch pad on a laptop. I couldn't get it to stay long enough for the part I needed to capture. I would have to start over and do it over and over again. It became quite difficult. Also, with the window snip and the full page snip. It would capture the browser buttons at the bottom. I didn't want those to be captured.
Don't get me wrong. I used the snipping tool for a lot of my screen shots. Mostly, when I was using my desktop as it is much easier holding the cursor with a mouse than a touch pad. Especially, when you are trying to drag the cursor to select the part that you want captured.
Google Awesome Screenshot browser extension
That's when I found out about the Google Awesome Screen shot tool. The problem that I was having with the Snipping tool (because I was using a laptop) the Google Awesome Screen shot tool fixed. When I selected the part to capture the page I wanted it stopped and formed a square and I could just continue to drag it around the part I wanted captured. I didn't have to keep starting all over again like I did with the Snipping tool. Also when I captured a whole page the browser buttons didn't show at the bottom. It only captured the page within the screen and not the whole screen, which is what I wanted in the first place. I could also annotate if I wanted to. This was exactly what I was looking for. It made things a lot more easier.
Google Full Page Screen Capture Browser Extension
This tool captures the whole page. I have used this on many occasions as well. This too, only captures the window and not the browser buttons at the bottom of the page. It's really quite simple. You are just capturing the page. Nothing fancy. If you want only to capture the whole page you will use this tool.
To get the Google Browser Extensions go to the Google Web store.
As you can see all of these tools have benefits and they make taking screenshots a lot easier. There is no reason why you can't have the perfect screenshots for your blog posts if you are using these tools.
|
|
|